Introduction
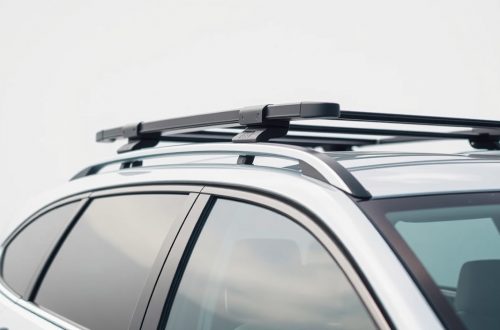
Installing a roof carrier can significantly enhance your vehicle’s cargo capacity, making road trips and outdoor adventures more convenient. However, many car owners find the process challenging and time-consuming. To help you install roof carriers quickly and securely, we’ve compiled some expert hacks that will simplify the process and ensure safety on the road.
Prepare Your Tools and Equipment
Before starting, gather all necessary tools such as a wrench, screwdriver, and possibly a ladder. Having everything at hand prevents unnecessary interruptions and makes the installation smoother.
Read the Manufacturer’s Manual Carefully
Each roof carrier and vehicle model may have specific installation instructions. Carefully reviewing the manual ensures you understand the correct mounting points and torque specifications, preventing damage or improper fitting.
Use a Helper or Assistive Devices
Roof carriers can be heavy and awkward to handle alone. Enlist a helper or use assistive devices like a step ladder or a roof rack mount to position the carrier comfortably and safely.
Leverage Proper Alignment Techniques
Align the roof carrier with the vehicle’s mounting points before tightening. Use painter’s tape or masking tape to mark the positions on the roof, ensuring precise placement and avoiding misalignment.
Secure the Carrier Incrementally
- Start by loosely attaching all bolts or clamps to keep the carrier in place.
- Check the alignment once again.
- Gradually tighten the fasteners in a crisscross pattern to evenly distribute pressure.
Apply Lubricants and Anti-Seize Compounds
Using a small amount of anti-seize compound on bolts can prevent them from seizing over time, making future adjustments or removals easier.
Double-Check Everything
After installation, double-check all fasteners for tightness, and ensure the carrier is firmly secured. Shake the carrier gently to test stability before hitting the road.
Additional Tips for Safe and Efficient Installation
- Consult your vehicle’s weight limits to avoid overloading.
- Use lock washers or security bolts if available, to prevent theft.
- Periodically inspect the roof carrier and fasteners for signs of wear or loosening.
Conclusion
Installing a roof carrier doesn’t have to be daunting. By following these hacks—preparing properly, aligning carefully, tightening securely, and double-checking—you can ensure a safe, efficient, and stress-free setup. Safe travels and enjoy the extra cargo space on your next adventure!