


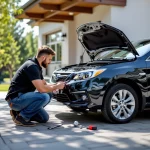





Introduction to DIY Car Window Tinting
Window tinting not only enhances the aesthetic appeal of your vehicle but also provides privacy, reduces heat, and protects your interior from harmful UV rays. While professional installation guarantees a flawless finish, DIY window tinting can be a cost-effective and rewarding project if approached correctly. In this guide, we’ll share essential tips and steps for successful DIY car window tinting.
Choosing the Right Tint Film
Before starting, select a high-quality tint film that complies with your local laws regarding darkness and reflectivity. Consider factors like UV protection, heat rejection, and durability. Opt for a reputable brand to ensure the tint adheres well and lasts over time.
Gathering Necessary Tools and Materials
- High-quality window tint film
- Spray bottle with soapy water
- Lint-free microfiber cloths
- Utility knife or sharp razor blade
- Application squeegee or plastic card
- Heat gun or hairdryer (optional but helpful)
- Masking tape
- Gloves and safety glasses
Preparation Steps
Ensure the windows are thoroughly cleaned and free of dirt, dust, and grease. Use a glass cleaner and a lint-free cloth for a spotless surface. Measure your windows accurately and cut the tint film slightly larger than the window dimensions to allow for trimming.
Step-by-Step Installation Process
- Wet the Window: Spray a generous amount of soapy water on the inside of the window. This helps position the tint film and reduces static and bubbles during application.
- Position the Film: Carefully peel off the backing from the tint film and place it on the wet window, using the water to slide it into position.
- Squeegee Out Air Bubbles: Starting from the center, smooth the film outward using a squeegee or plastic card. Be gentle to avoid scratching the film.
- Trim Excess Tint: Once the film is properly aligned and bubble-free, use a utility knife to trim the excess edges for a clean fit.
- Dry and Set: Use a heat gun or hairdryer on a low setting to gently shrink the film if needed, ensuring it contours to the glass. Allow the tint to cure for at least 24-48 hours without rolling down windows.
Additional Tips for a Professional Finish
- Work in a dust-free environment to prevent particles from sticking to the adhesive.
- Be patient and take your time during each step.
- Use a steady hand when trimming to avoid uneven edges.
- Follow the manufacturer’s instructions for curing and care.
Conclusion
DIY window tinting can be a satisfying project that saves money and allows you to customize your vehicle. By choosing quality materials, preparing properly, and following these installation tips, you can achieve a professional-looking tint that enhances your car’s appearance and comfort. Remember, patience and attention to detail are key to a successful DIY window tinting experience.